Suunto Essential User Guide
Getting started
Basic settings
Press any button and your Suunto Essential will activate. You are then prompted to set the language, units (imperial or metric), time and date. Use the upper right button and lower right button to change the settings. Accept and move to the next menu item by pressing the right middle button. You can always return to the preceding menu item by pressing the lower left button. When the settings are set as you want, you can start using the basic time features of your Suunto Essential.
You need to set the altimeter, barometer and compass to get correct readings. Please refer to the User Guide for detailed information on setting these properly.
Modes
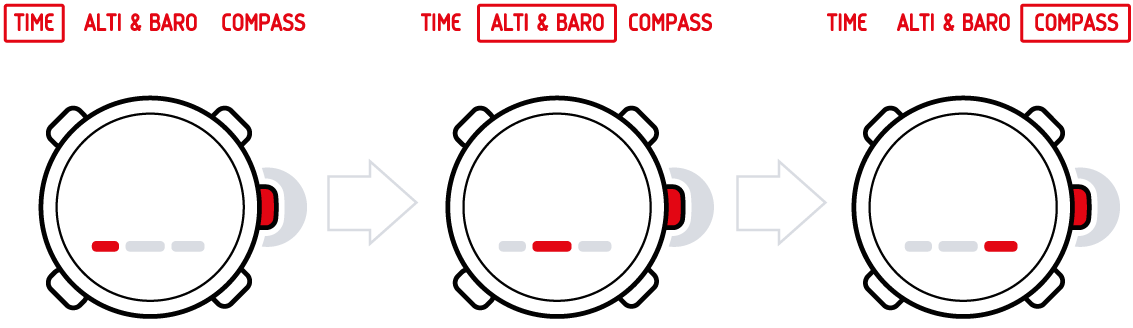
Your Suunto Essential has three modes: time, ALTI & BARO and Compass. These modes are explained in detail in the User Guide. The enabled mode is indicated by a rectangle around the mode name. You switch between the main modes with the right middle button. Try it!
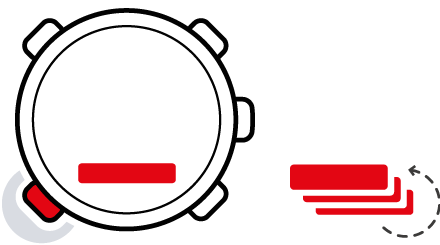
Views
Each mode has a set of views that you access with the lower left button. Views are presented in the lower part of the display. Views contain supplementary information about the enabled mode, for example, viewing seconds as supplementary information in the time mode. Some views are also interactive.
Suunto Essential has four interactive views:
- Stopwatch (time mode)
- Countdown timer (time mode)
- Log recorder (ALTI & BARO mode)
- Altitude difference measurer (ALTI & BARO mode)
When interactive views are enabled, you can start, stop and restart them with the upper left button and reset them by keeping the upper right button pressed. Enter the stopwatch in time mode and try it out!
Menu
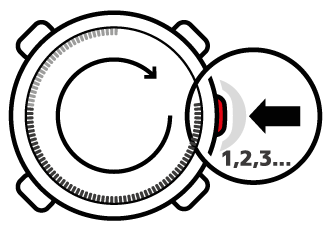
In Menu you can change values, change the general settings and units, or view logs stored in the logbook. To enter Menu, keep the middle right button pressed while in the time, ALTI & BARO or Compass mode. The segments in the outer part of the display indicate your transition time. Exit Menu by pressing the upper left button. Whenever an exit option is available in Menu, this is indicated with an “X” on the screen next to the button. Get familiar with entering and exiting Menu!
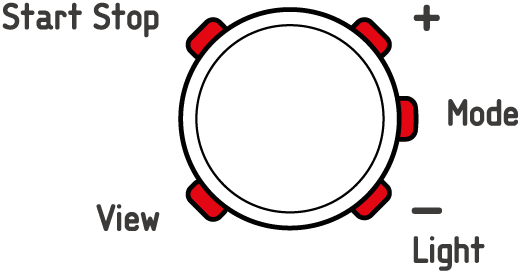
Backlight
You can activate the backlight in any mode by pressing the lower right button. The backlight turns off automatically after 5 seconds. If you want to see the backlight when you are in Menu, you need to activate it in the time, ALTI & BARO or Compass mode before entering Menu. The backlight will return to normal when you return to a mode.
Button lock
You can activate and deactivate the button lock by keeping the lower right button pressed.
You can change views and use the backlight when the button lock is activated.
Changing values
To change a setting, you have to be in Menu. To enter Menu, keep the right middle button pressed down in the time, ALTI&BARO or Compass mode. Any changes you make in Menu take effect immediately. For example, if you enter TIME-DATE in Menu and change the time from 12:30 to 11:30 and exit. The time will be set to 11:30.