Suunto Core User Guide
Using altimeter profile
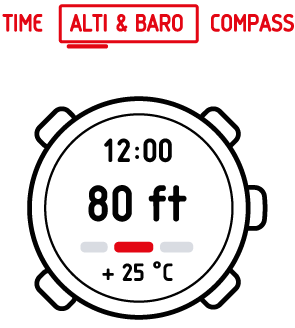
The altimeter profile calculates altitude based on the reference values. The reference values can either be sea level air pressure or a previous point of altitude reference value. When the altimeter profile is activated, the word Alti is underlined on the display.
When the altimeter profile is activated, you can access the following views with :
- Log recorder: records the altitude changes into logs
- Altitude difference measurer: measures the altitude difference from a set point
- Temperature: measures the current temperature
- Empty: no supplementary information
Using altitude difference measurer
The altitude difference measurer shows the difference in altitude between a set point and your current position. This feature is especially useful for mountain climbing, for example when you want to track your progress in terms of altitude climbed.
To use the altitude difference measurer:
- In the Alti & Baro mode, select the altitude difference measurer view.
- Start, stop and restart it with .
- Keep pressed to reset.
You are about to start climbing a mountain that is 3, 280 feet (1000 m) high. You want to be able to check your progress as you climb, so you activate the altitude difference measurer on your Suunto Core. You start climbing, checking your altitude occasionally to see how far you are from the next check point. At some point you start to get tired. You check your altitude, and see that there’s still a lot of climbing ahead. Maybe you need to rethink your next check point.
Recording logs
The log recorder stores all your movements in altitude between the start and stop times. If you are engaged in an activity in which your altitude changes, you can record the altitude changes and view the stored information later.
You can also set altitude marks (laps), allowing you to view the duration and ascent/descent height between your previous mark and current mark. Your marks are stored in memory and you can access them later.
To record a log:
- In the Alti & Baro mode, select the log recorder view.
- Start, stop and restart it with .
- When you are recording a log, set laps with .
- Keep pressed to reset (this can only be done when the recorder is stopped).
Log height difference: shows the measured altitude difference between a log starting point and a log finishing point with the following icons:
| In the additional views: | |
| is displayed when your altitude is above the starting point. | |
| is displayed when your altitude is the same as at the starting point. | |
| is displayed when your altitude is below the starting point. | |
| is displayed when you view how much you have ascended from the log start. | |
| is displayed when you view how much you have descended from the log start. |
Altitude points are recorded according to the recording interval you have chosen (see Choosing recording interval).
To change the recording rate:
- In Menu, select memory.
- Select rec interval.
- Change the recording rate with and .
An estimation of how much time you can record is shown in the lower part of the display when you browse between the recording rates. The actual recording durations may vary slightly depending on your activity during the recording period.
You can access your history of recorded logs, including log details, from logbook in Menu (see Viewing and locking logs).
When you have stopped the log recorder, you can enter the logbook and view your current recordings before you reset the recorder.