Suunto Spartan Sport User Guide - 2.6
Routes
You can use your Suunto Spartan Sport to navigate routes. Plan your route in Suunto app and transfer it to your watch with the next sync.
To navigate on a route:
- Swipe down or press the upper button to open the launcher.
- Scroll to Navigation and tap on the icon or press the middle button.
![]()
- Scroll to Routes and press the middle button to open your list of routes.
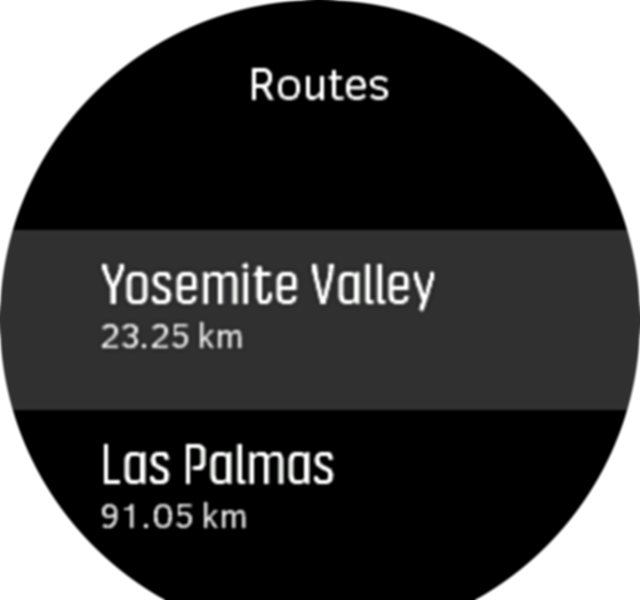
- Scroll to the route you want to navigate to and press the middle button.
- Press the upper button to start navigating.
- Press the upper button again at any time to stop navigating.
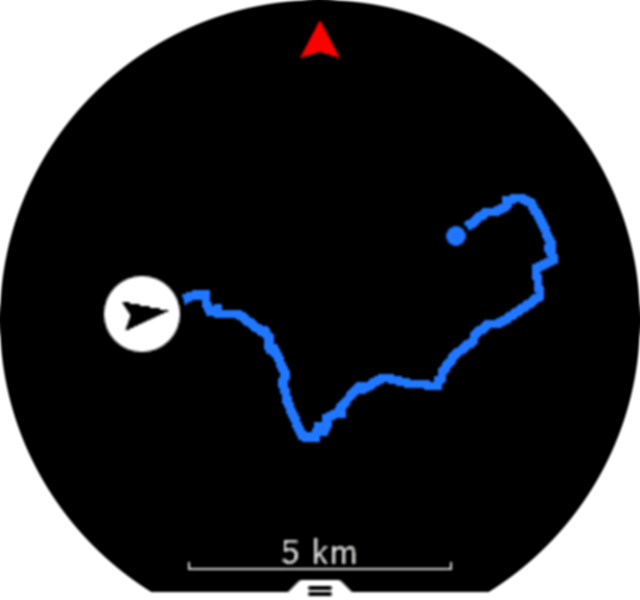
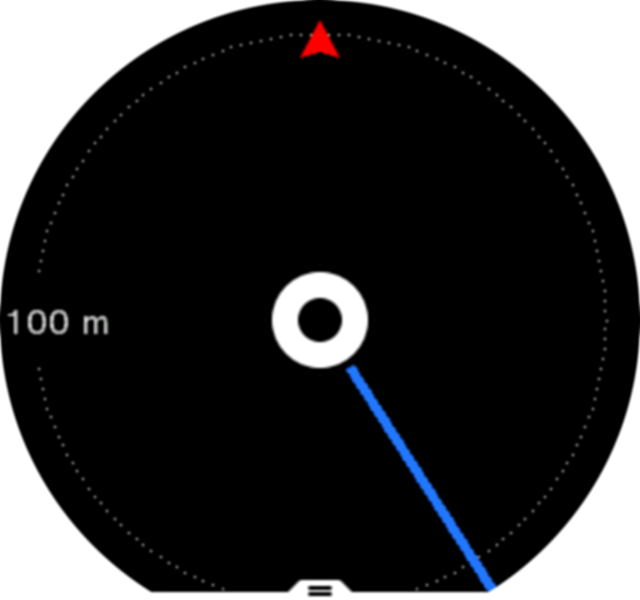
Tap the screen to switch between the overview map and a more detailed view.
In the detailed view, zoom in and out by tapping the screen or keeping the middle button pressed. Adjust the zoom level with the upper and lower buttons.
While you are in the navigation display, you can swipe up from the bottom of the screen or press the lower button to open a list of shortcuts. The shortcuts give you quick access to navigation actions such as saving your current location or selecting another route to navigate.
All sport modes with GPS also have a route selection option. See Navigating during exercise.
Navigation guidance
As you navigate a route, your watch helps you stay on the correct path by giving you additional notifications as you progress along the route.
For example, if you go more than 100 m (330 ft) off route, the watch notifies you that you are not on the right track, as well as lets you know when you are back on route.
Once you reach a waypoint of POI on the route, you get an informative popup showing you the distance and estimated time en route (ETE) to the next waypoint or POI.
If you navigating a route that crosses itself, such as a figure-8, and you make a wrong turn at the crossing, your watch assumes you are intentionally going in a different on the route. The watch shows the next waypoint based on the current, new direction of travel. So, keep an eye on your breadcrumb trail to ensure you are going the right way when you are navigating a complicated route.
Altitude navigation
If you are navigating a route that has altitude information, you can also navigate based on ascent and descent using the altitude profile display. While in the main navigation display (where you see your route), swipe left or press the middle button to switch to the altitude profile display.
The altitude profile display shows you the following information:
- top: your current altitude
- center: altitude profile showing your current position
- bottom: remaining ascent or descent (tap screen to change views)
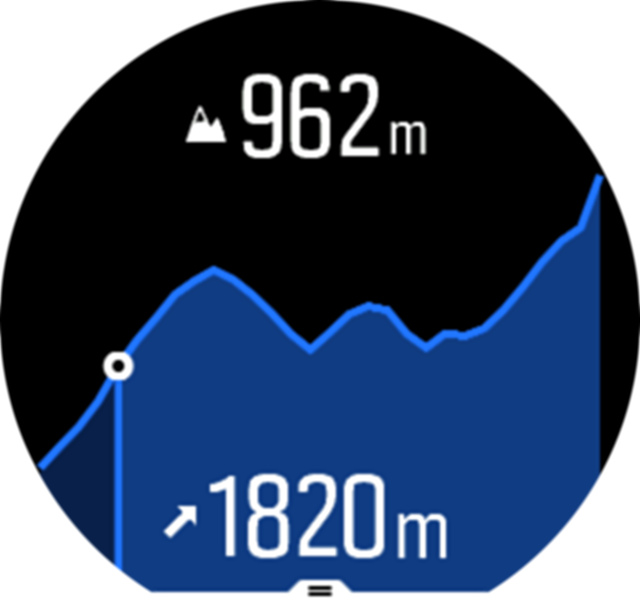
If you stray too far off from the route while using altitude navigation, your watch will give you an Off route message in the altitude profile display. If you see this message, scroll to the route navigation display to get back on track before continuing with altitude navigation.