Whatever outdoor sport you’re into, the Living Peak Adventure article series shows you how to find, create and navigate smoking routes. The series covers:
- How to find hot routes with Suunto app heatmaps
- How to find popular starting points
- How to create your own routes
- How to share your routes with friends
- How to navigate a route outdoors
How to create your own routes
In the previous two articles, we explained how to find routes and starting points popular with our community. Say you had a look at these and decided they aren’t enough of a challenge for you. Perhaps, as an example, you need to plan out a block of hill training and want to find a route with plenty of vertical ascent. Then create your own!
You can also create routes on the go with Suunto app.
Getting started
Open Suunto app maps and decide where you’d like to start. You can tap the arrow pointer above the search icon on the screen to reveal your current location and start your route there if you like. Just tap on the screen and you have your starting point, presented as a blue circle with A inside.
Choose your mode
Next, you can begin designing your route in a number of ways. On your screen, notice an icon with a mountain, trail and trees symbol - tap that and you’ll open the “routing mode” menu. Select which option fits best for your motivation and activity type. You can select the “free drawing” option if you’re taking paths that might not be on the map and don’t want the app to automatically suggest it. Or, if you’ll be following known roads and paths, select the “any road or path” option. Choose which of the five routing modes make the most sense for you.
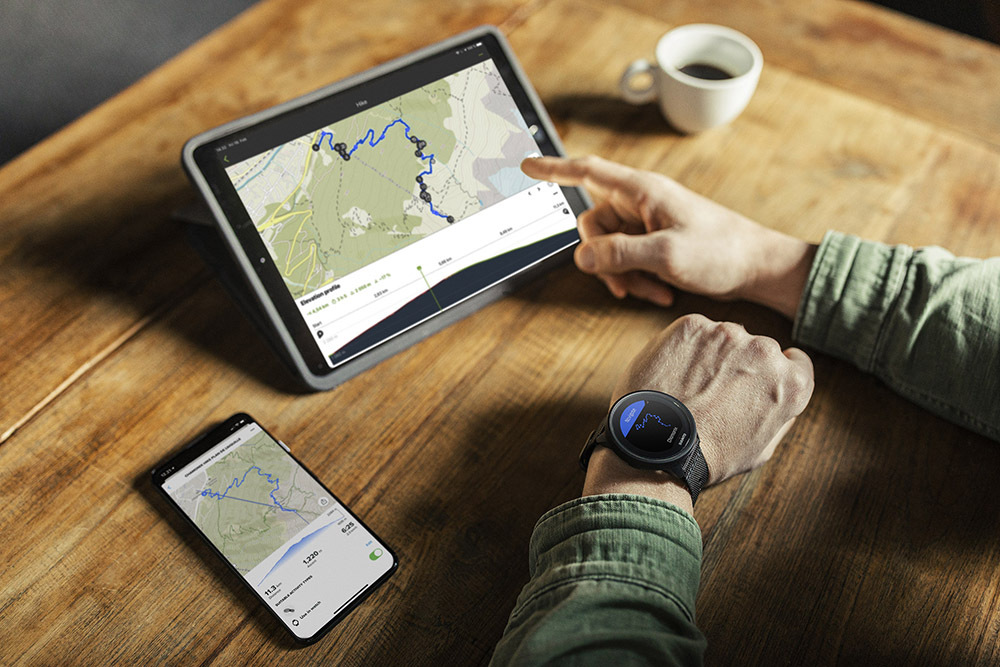
Monitor the distance and more
As you create your route, the app will calculate the distance, vertical meters and estimated duration and present this information in a box at the bottom of your screen. That way you can keep track of how long and challenging your route might be.
Toggle between maps
As you extend your route, you can toggle between various map options to help you see exactly where you want it to go. For example, switch from 2D to a 3D map to get a better lay of the land and to look for ascents to include or avoid. You can switch between five different map styles - outdoor, satellite, dark, light and winter - to help you create your route. If you’re planning a winter cross-country skiing route, for example, select the winter map style.
After creating a route you can toggle the turn-by-turn guidance on or off.
Get turn-by-turn guidance
You can choose whether or not the route you create includes turn-by-turn guidance. Simply tap the eye icon at the top of your screen to turn it on or off. When it’s on, this means it will automatically add all the left and right turns and once you’re following your route outdoors your watch will notify you of every turn.
Add waypoints
As you build your route, you can add in waypoints along the way. For example, you can add in camp, cafe, hostel and hotel waypoints to indicate the locations of these along your route. To add a waypoint, simply hold your finger on the map where the waypoint is located and then a menu will pop up. Tap the waypoint icon and then tap the flag icon again when the next menu box appears. Then scroll down to select the type of waypoint it is.
Save your route
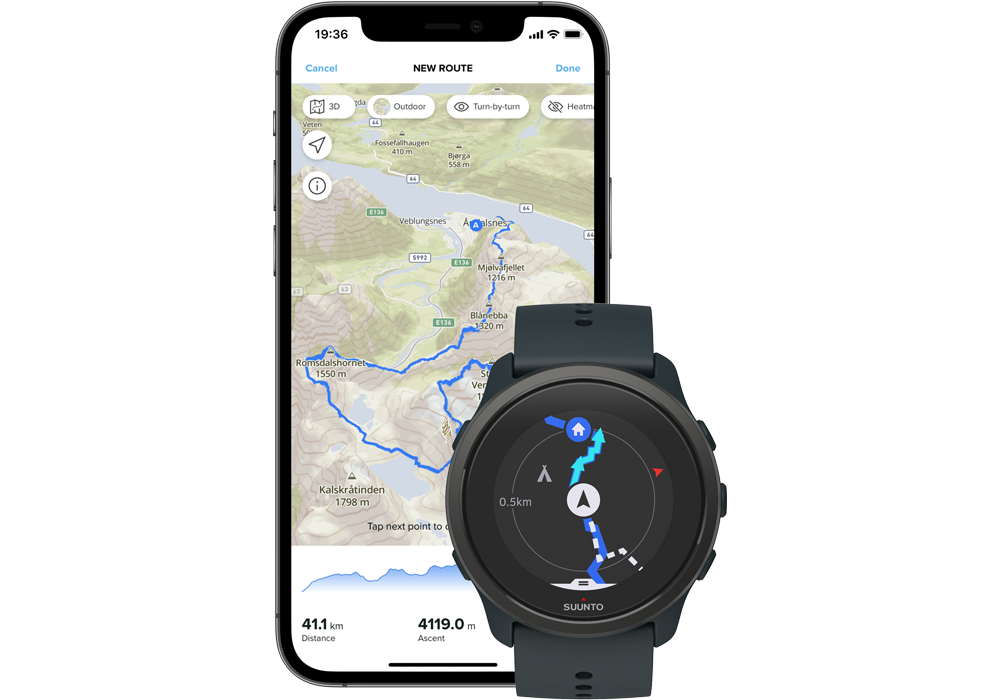
You completed building your route, now all you need to do is save it, sync it with your watch and, if you desire, share it with your adventure buddies. To save, tap “done” in the top right corner. A menu box will appear that will tell you the total distance, ascent and duration of your route. Beneath that information, you must name your route, and can edit the activity type if required, turn on and turn off turn-by-turn guidance, and command the app to sync it with your watch. Tap “save” in the bottom right corner. You can now share your route.
You can also create routes on our partner platforms, like Komoot, and sync them to your Suunto for navigation.
Use our partner services
Suunto is proud to have a wide array of partners we cooperate with. Some of these, such as Komoot and FATMAP, are route finding and planning platforms that can enhance what Suunto app offers you.
You can connect your Suunto app account with Komoot or FATMAP, for example, and sync the routes you’ve created in one of those platforms with your Suunto account and watch. Just open Suunto app, tap your profile pic in the top left corner, tap “Partner services”, scroll down and select the platform you’d like to connect to. You’ll then need to login to your account there and confirm you grant it access.
Now you can find or create routes in one of our partner platforms and sync it with your Suunto watch.
Read more
How do I create a route in Suunto app for iOS
How do I create a route in Suunto app for Android
How do I create and sync Points of Interest (POI) with Suunto app


