You’ve reached the fifth and final article in the Living Peak Adventure series, which gives you everything you need to know to find, create and navigate routes that’ll keep you stoked. The series covers:
- How to find hot routes with Suunto app heatmaps
- How to find popular starting points
- How to create your own routes
- How to share your routes with friends
- How to navigate a route outdoors
How to navigate a route outdoors
Say it’s time to head out on that two night hike with your adventure buddies; you synced the route - with turn-by-turn guidance on - that you created in Suunto app with your Suunto GPS watch, and now you’re at the car park and ready to start walking. Let your watch guide you.
Select the route and navigate
To get started with route navigation, enter the “Exercise” menu on your watch and select your preferred sport mode - in the example above “hiking”. Now, before pressing “Start”, press the bottom button or scroll down to access the “options” menu and select “navigation” then “routes”, then select the relevant route and then tap “navigate”. Once you press start to commence your exercise activity, route navigation will appear as one of your watch screens.
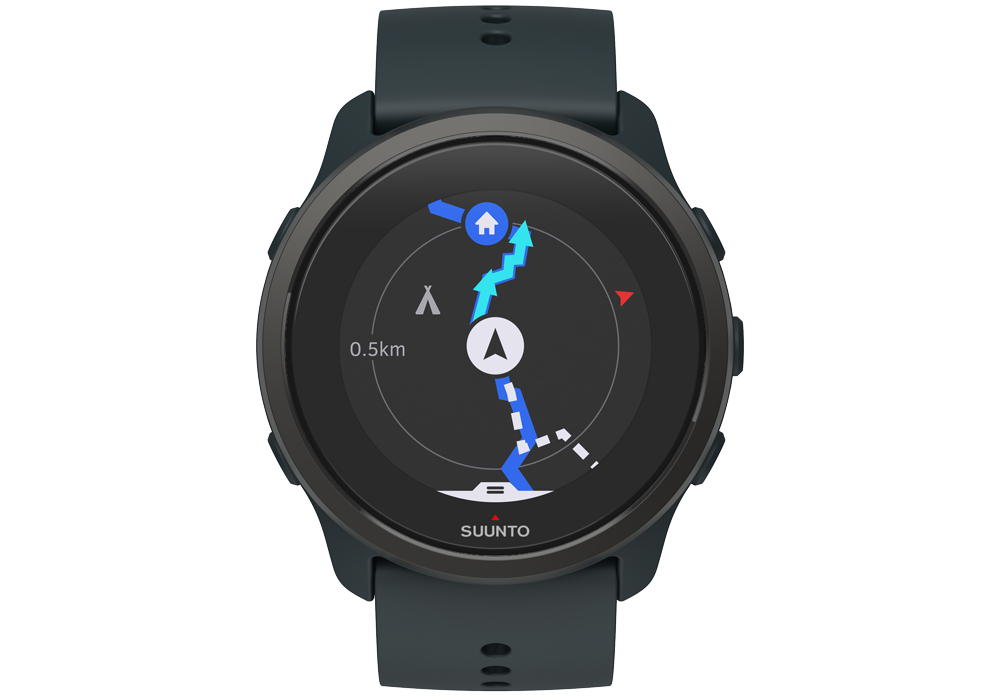
Follow the lines
On the watch scree you’ll see two lines:
- The dotted “breadcrumb” trail shows the path you have covered
- The blue line is your planned route
This is helpful outdoors because perhaps you’ll encounter an obstacle - such as a fallen tree or a swollen river - that you have to go around. The lines will show you where you are in relation to your planned route and how to get back on track.
The breadcrumb line is very useful for another reason: even when you are not navigating a route, you can see the path you have already taken and can use it to backtrack part of or all of the way as required.
You can also zoom in and out of the route navigation view: simply long press the middle button and use the other buttons to zoom.
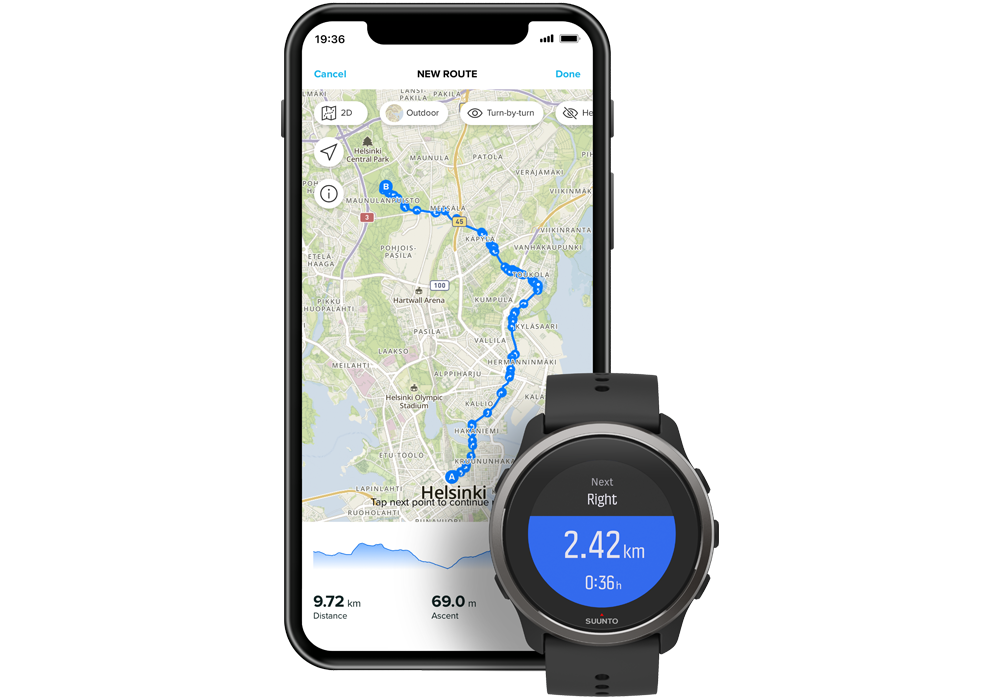
Turn-by-turn navigation
When creating routes in Suunto app, you can choose to activate turn-by-turn instructions. When the route is transferred to your watch and used for navigation, it will give you turn-by-turn guidance with a sound alert and information on which way to turn. If you go more than 100 m (330 ft) off route, for example, the watch notifies you that you are not on the right track, as well as lets you know when you are back on route.
Now go and explore!
Now you’ve learned the basics by reading this five-part series, it’s time to test out and master all the features at your disposal. Step by step you will build confidence, allowing yout to explore further and further. A world of adventure is awaiting you - get out there!