Suunto Ocean User Guide
Dive setup
Suunto Ocean has two dive modes for Scuba diving: Single gas and Multigas and one freedive mode: Freediving (depth). You can find all dive modes under the main menu by swiping down from the watch face or pressing the upper button and select the mode by pressing the middle button.
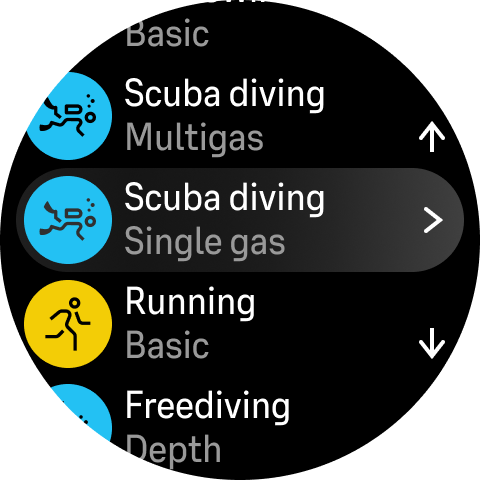
Automatic dive start
Suunto Ocean has an automatic start functionality that recognizes pressure increase and water contact. The device enters dive state from the pre-dive screen or from any other watch screen:
- When in contact with water and the absolute pressure equals to your set dive start depth (the default start depth is 1.2 m / 4 ft).
- Or if no water contact is recognizable but the absolute pressure equals to your set dive start depth (the default start depth is 1.2 m / 4 ft) + 1.8 m (5.9 ft).
Scuba dives automatically end after the set Dive end time (the default time is 5 min) and when:
- When in contact with water and the absolute pressure equals to or is less than your set dive start depth (the default start depth is 1.2 m / 4 ft).
- Or if no water contact is recognizable but the absolute pressure equals to or is less than your set dive start depth (the default start depth is 1.2 m / 4 ft) + 1.8 m (5.9 ft).
If submerged from any non-diving watch screen, Suunto Ocean automatically enters the dive mode you have last configured.
The Dive start depth can be defined under Dive settings in scuba modes and under Dive options in freedive mode.
Suunto Ocean does not enter dive state if you are already in another exercise view.
The automatic dive start is a precaution feature. We recommend that you always start the dive by entering the selected dive mode to confirm your gas and dive settings.
Dive modes
Suunto Ocean has two scuba dive modes and a freedive mode that come with pre-defined settings to prepare for certain type of diving.
Single gas:
This dive mode is best suited for no-decompression recreational diving with only one gas, Air or Nitrox.
- One active gas, up to five disabled gases
- Air or Nitrox mixes
- Tank POD pairing to active gas
Multigas:
This dive mode is best suited for technical diving with multiple gases.
- Up to five enabled and disabled gases
- Air or Nitrox mixes, up to NX99
- Time to surface (TTS), ppO2 always on dive screen
- Tank POD pairing to multiple gases
Freedive:
This dive mode is designed for recreational freediving.
- Separate underwater and surface views
- Ascent and descent speed
- Multiple dive time and depth alarm options
Button functions during scuba diving
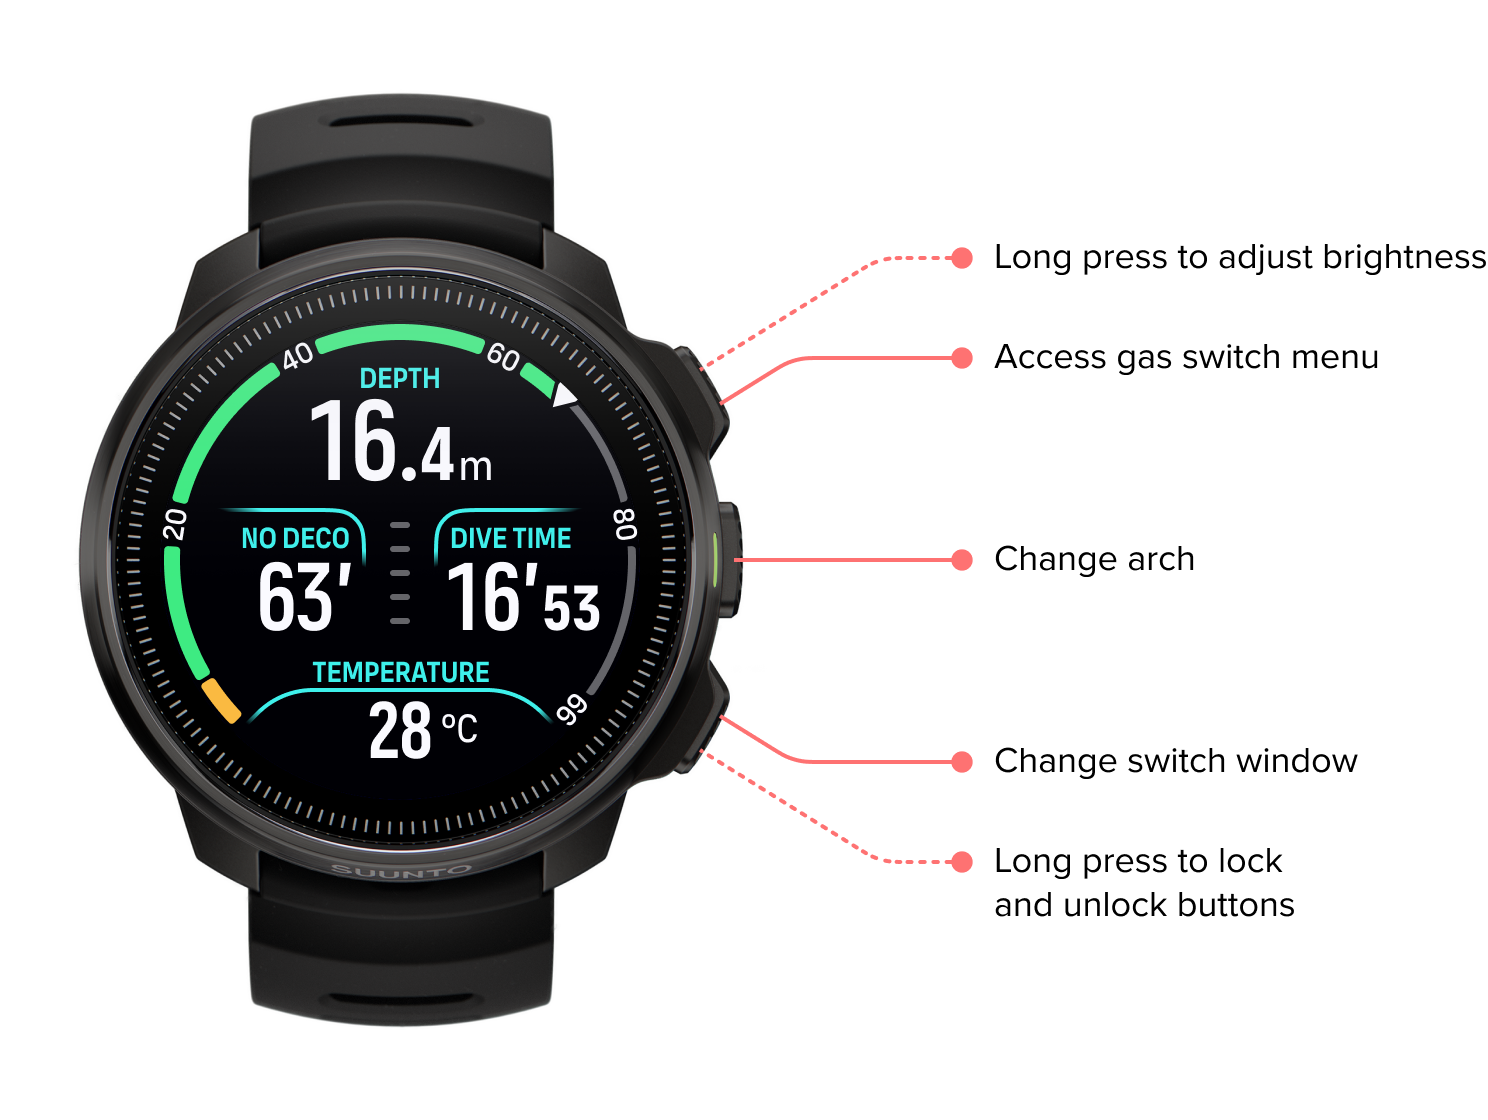
Your Suunto Ocean has three buttons that have different functionalities when short pressing or long pressing them during the dive.
Upper button short press: Access gas switch menu (only in Multigas mode)
Upper button long press: Adjust brightness level (Low/Medium/High)
Middle button short press: Change arch
Lower button short press: Change switch window item
Lower button long press: Lock buttons
See Button and screen lock.
Pre-dive screen and dive options
The pre-dive screen is the same for all dive modes, but each mode has several dive mode specific options that can be adjusted to your diving needs.
A set of icons appears on the pre-dive screen, depending on what you are using with the dive mode, such as heart rate, Tank POD and GPS. The following elements can be seen on the display:
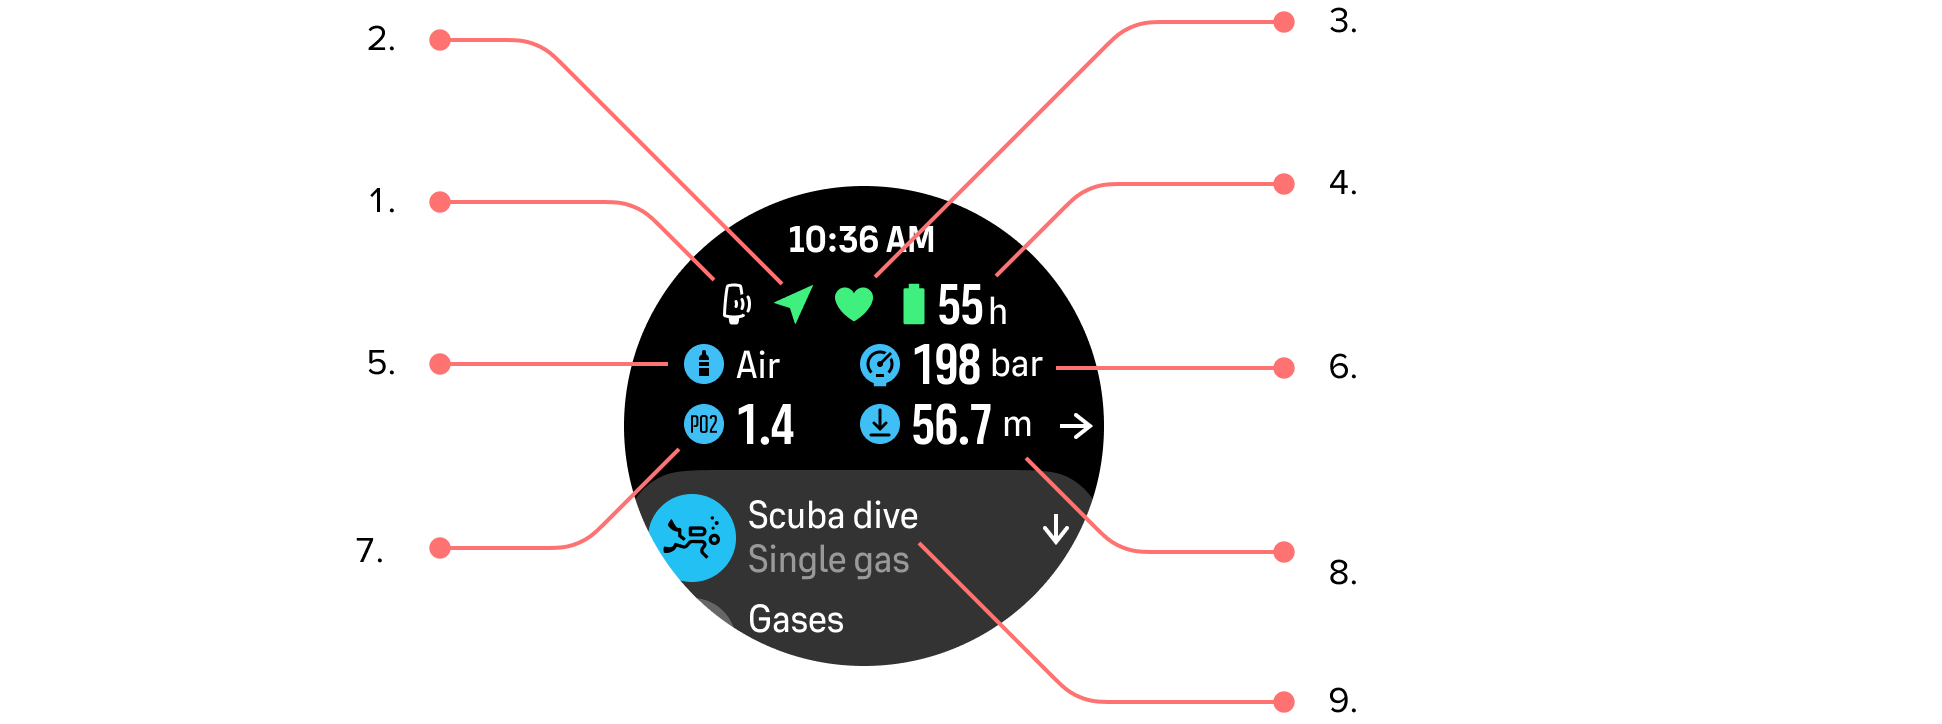
Tank POD icon if linked and active
GPS signal if enabled
Heart rate if enabled
Remaining battery time in hours
Active gas mix
Tank pressure if linked to Tank POD and active
The set maximum partial pressure limit (ppO2) for the active gas
The maximum operating depth (MOD) for the active gas
Active dive mode
GPS signal: The arrow icon (connected GPS) flashes gray while searching and turns green once a signal is found. We recommend to wait for the GPS icon to turn green before jumping into the water for accurate GPS location.
Heart rate: The heart icon (heart rate) flashes gray while searching and once a signal is found, it turns into a colored heart attached to a belt if you are using a heart rate sensor or a colored heart without the belt if you are using the optical heart rate sensor. See Pairing pods and sensors for pairing a heart rate sensor.
Tank POD: The tank icon on the left is only visible if you have a Tank POD paired to your gas and it is active.
Battery: The battery icon tells you how many hours you can dive before the battery runs out.
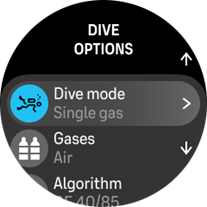
When scrolling up from the pre-dive screen, you can access the following settings:
Changing dive mode:
You can change the dive mode to another dive mode or any other exercise mode by tapping on the dive mode name.
Gases:
You can modify the oxygen percentage and ppO2 settings for your dive gases under Gases. See Gases.
Algorithm:
The algorithm settings provides you options for modifying your decompression algorithm for the specific dive mode. See Algorithm settings.
Alarms:
You can set alarms for reaching a certain depth, dive time or tank pressure. See Dive alarms for more information on dive related alarms.
Tank POD:
The Tank POD menu is for linking and unlinking available Tank PODs to your gas. See How to install and link a Suunto Tank POD.
Sensors:
Pair your heart rate sensor to record your diving. See Pairing pods and sensors.
Dive settings:
You can find various additional settings for your dive modes under Dive settings. See Dive settings for the available options.
Main dive view
While on the pre-dive screen, you can scroll through the different dive views by pressing the middle button. On a default dive display, you see the following information:

Decompression information
Ascent speed with color coding
Dive time
Depth
Switch window with changeable information
Arch illustrating key information: no deco limit, tank pressure, time to surface, stop time
Key information during diving
During diving, your watch displays the following information:
Decompression information:
The decompression area on the screen is fixed and shows the following data in the following situations:
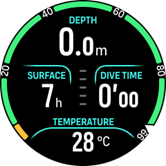
Surface time: When surfacing, the decompression area is replaced with a surface timer. It shows the elapsed time between surfacing from a dive and beginning a descent for the subsequent dive. It shows the time in minutes and seconds up to one hour. Above one hour, the time is displayed in hours and minutes up to 24 hours, and after that, hours up to seven days and then only in days.
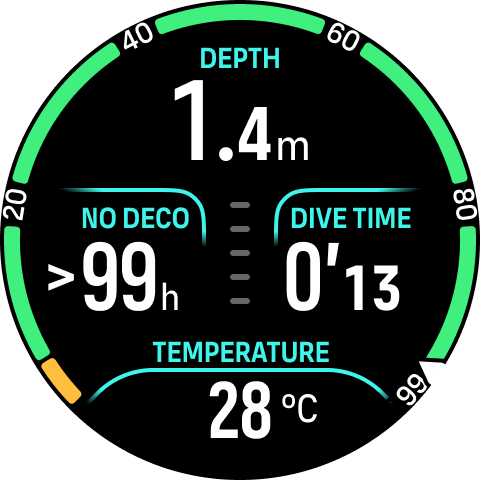
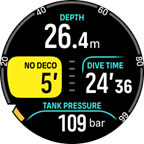
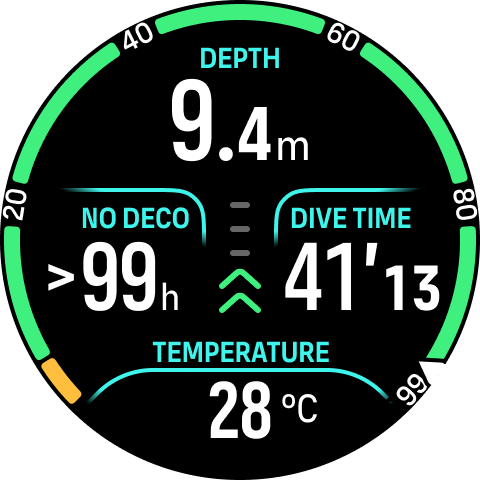
No Decompression Limit (NDL): Once a dive has started, the surface timer is replaced with the NDL time. It shows the time remaining in minutes at the current depth until mandatory decompression stops are required. If NDL time is above 99 minutes, it is displayed as >99. When the NDL time is 5 minutes or less, a mandatory alarm is triggered and the display area is highlighted until resolved or replaced with decompression information. Read more about the mandatory alarms in Mandatory dive alarms.
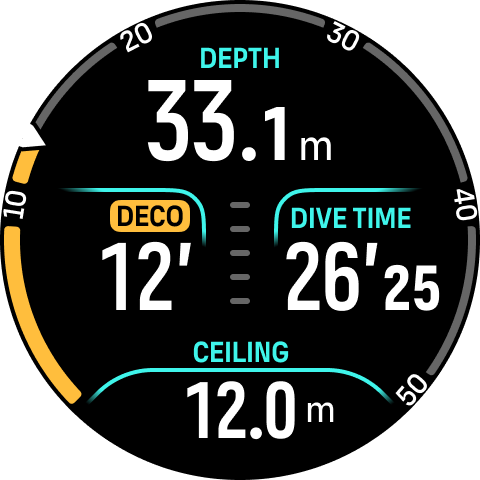
Deco time: If exceeding the NDL time, an alarm is triggered and the NDL time is replaced with the optimum ascent time in minutes (TTS). A Deco badge appears, the NDL arch turns to orange indicating the same TTS time, and the ceiling value appears in the switch window. The ceiling value indicates the decompression stop depth. An alarm is also triggered that can be confirmed by pressing any button. Read more about decompression diving in Decompression dives.
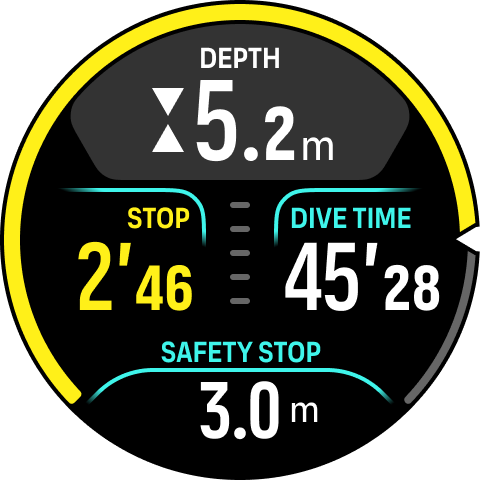
Stop time: If a safety stop or deco stop is required during the dive, the NDL or decompression information is replaced with a stop timer counting down the required stop time in minutes and seconds. The stop depth range will be indicated in the depth area. Once the stop is completed, Stop done is displayed in the switch window. You can adjust the safety stop time to be 3, 4 or 5 minutes (the default length is 3 minutes) in the Algorithm settings.
Ascent rate:
During a dive, the bar in the middle of the screen indicates how fast you are ascending. One bar step corresponds to 2 m (6.6 ft) per minute.

The bar is color coded to show the following:
Gray indicates ascent rate is less than 2 m (6.6 ft) per minute
Green indicates ascent rate is between 4 m (13 ft) per minute and 8 m (26 ft) per minute
Yellow indicates ascent rate is over 8 m (26 ft) per minute
Red indicates ascent rate is 10 m (33 ft) per minute
Highlighted red indicates ascent rate is over 10 m (33 ft) per minute for 5 sec or longer
DO NOT EXCEED THE MAXIMUM ASCENT RATE! Rapid ascents increase the risk of injury. You should always make the mandatory and recommended safety stops after you have exceeded the maximum recommended ascent rate.
Arch illustrating key information
Suunto Ocean comes with different arches for both Single gas and Multigas modes.

No deco: The arch shows the no deco time in a fixed range from 0 – 99. The arch is green for the range 5 – 99, and orange for the range 0 – 5. If the value is higher than 99, the indicator is stopped at the end.
Tank pressure: The arch shows the tank pressure if the watch is paired with a Suunto Tank POD. The range is determined by the Tank POD pressure reading value at the start of a dive and it can be 250 bar or 350 bar. The bars on the arch always represent 50 bar or 500 psi depending on unit settings. The colors represent certain parts of the range and they are always fixed to:
Red : 50 bar / 750 psi or less
Orange: 51 bar – 80 bar / 750 psi – 1000 psi
If no Tank POD is paired or the signal is lost, the arch is gray. See How to install and link a Suunto Tank POD on how to link your Tank POD.
Compass: The arch shows the magnetic north (marked with a red arrow) and the four cardinal directions. See Compass use during diving.
Empty: Dive view without the arch.
In addition, there are two dynamic arches:
Stop timer: If a stop is required, the arch shows the value corresponding to the dive view window.
TTS: If exceeding the NDL time, the arch turns orange and shows the Time to surface (TTS). The TTS arch range is fixed to 0 – 50 min. If the value is higher than 50, the indicator is stopped at the end.
Press the middle button to scroll between the arches.
Switch window for scuba diving
The switch window at the bottom of the dive screen can contain different types of information that can be changed by short pressing the lower button.
| Switch window | Switch window content | Explanation |
|---|---|---|
 | Temperature | The current temperature in degrees Celsius or Fahrenheit, depending on unit settings. |
 | Max depth | The maximum depth reached during the current dive. |
 | Clock | The time in a 12- or 24-hour format, based on the time format you set under Time/date settings. |
 | Battery | The remaining battery level as percentage. See Mandatory dive alarms for battery alarms. |
 | Tank pressure | The tank pressure in the set unit (bar or PSI) for your active gas if linked to a Tank POD. |
 | Gas consumption (L/min or cu ft/min) | Gas consumption refers to your real-time consumption rate of gas during a dive. The actual gas consumption rate is measured in liters per minute (cubic feet per minute) and calculated for the current depth. See Gas consumption for more information. |
 | Gas time | Gas time refers to the time you can stay at the current depth. See Gas time for more information. |
 | Safety stop | A three (3) minute safety stop is always recommended for every dive over 10 meters (33 ft). Once exceeding 10 m (33 ft), the 3 m (9.8 ft) minimum depth of the safety stop is displayed in the switch window. Safety stops can be set to three (3), four (4), or five (5) minutes in the Algorithm settings. |
 | Time to surface (TTS) | The time to surface refers to the ascent time in minutes to ascend to the surface with given gases including all required decompression stops. |
 | Actual ppO2 | The current partial pressure of the active gas. Partial pressure is the fraction of oxygen in the gas at the current depth. The value is always in absolute atmospheres (ATA) of pressure. (1 ATA = 1.013 bar) If the ppO2 exceeds the preset limit for the gas, the switch window turns yellow and triggers an alarm. If the ppO2 exceeds the maximum partial pressure limit of 1.6, the switch window turns red until you ascend shallower than the MOD depth. |
 | MOD | Maximum Operating Depth. MOD is the depth at which the partial pressure of oxygen (ppO2) of the gas mix exceeds a safe limit. |
 | Average depth | The average depth of the current dive is calculated from the moment the start depth is exceeded until the dive ends. |
 | Sunset ETA | The estimated time until sunset expressed in hours and minutes. Sunset time is determined via GPS, so your watch relies on the GPS data from the last time you used GPS. |
 | Gradient factors | The Gradient Factor value you have defined in the Algorithm settings. See Algorithm settings and Gradient Factors for more information about the dive algorithm and Gradient Factors. |
 | Heading | The compass feature shows heading in degrees and the cardinal and inter cardinal direction. The compass calibrates itself when in use, but if a recalibration is needed, a prompt will pop up. To calibrate the compass, turn and tilt the watch in a figure-8. |
Dynamic values
Some values are visible in the switch window by default. The values appear in the window only if they are triggered by an alarm or event.
OTU
Oxygen tolerance unit. It is used to measure the whole-body toxicity, caused by prolonged exposure to high oxygen partial pressures. Suunto Ocean alarms you when the daily recommended limit reaches 250 (caution) and 300 (warning).

CNS
Central nervous system toxicity. The CNS value is a measure of how long you have been exposed to elevated partial pressures of oxygen (ppO2), displayed as a percentage of a maximum allowable exposure. Suunto Ocean alarms you when CNS% reaches 80% (caution) and when the 100% limit (warning) is exceeded.

The oxygen exposure calculations are based on currently accepted exposure time limit tables and principles. The limits are based on the NOAA Diving Manual. The CNS percentage is calculated continuously when in diving mode, even when on the surface.
In addition to this, the dive computer uses several methods to conservatively estimate the oxygen exposure. For example:
The displayed oxygen exposure calculations are raised to the next higher percentage value.
The CNS% limits up to 1.6 bar (23.2 psi).
The OTU monitoring is based on the long-term daily tolerance level and the recovery rate is reduced.
At the surface and after the dive has ended, the CNS decreases with a half time of 90 min. For example, if the CNS is 100 after the dive, 90 min later it will be decreased to 50 and then after another 90 min to 25.
WHEN THE OXYGEN LIMIT FRACTION INDICATES THAT THE MAXIMUM LIMIT IS REACHED, YOU MUST IMMEDIATELY TAKE ACTION TO REDUCE OXYGEN EXPOSURE. Failure to take action to reduce oxygen exposure after a CNS%/OTU warning is given can rapidly increase the risk of oxygen toxicity, injury, or death.
Ceiling
When mandatory decompression stops are required, a ceiling value appears in the switch window. Suunto Ocean shows the ceiling value always from the deepest stop. You must not ascend above the ceiling during your ascent. Read more about decompression diving in Decompression dives.
